


Photo by Christina @ wocintechchat.com on Unsplash
How to Launch and Configure a WordPress Instance with Amazon Lightsail


Table of contents
- What is AWS Lightsail?
- Step 01 — How to launch an AWS Lightsail instance with WordPress blueprint?
- Step 02 — How to connect to your Lightsail instance using SSH?
- Step 03 — How to sign into your newly installed WordPress instance?
- Step 04 — How to attach a static IP to your Lightsail instance?
- Step 05 — How to create a DNS zone and map it to your Lightsail instance?
What is AWS Lightsail?
Amazon Lightsail is a virtual private server (VPS) service offered by Amazon Web Services (AWS). It is designed to make it easy for users to set up and manage a VPS, and includes a range of preconfigured applications and templates to make it easy to get started. Lightsail includes everything you need to launch your project quickly, including a virtual machine, SSD-based storage, data transfer, DNS management, and a static IP. It is a good option for users who want the power and flexibility of a VPS without the complexity of managing a full-blown cloud infrastructure.
This article demonstrates the following;
How to launch an AWS Lighsail instance with WordPress blueprint?
How to connect to your Lightsail instance using SSH?
How to sign into your newly installed WordPress instance?
How to attach a static IP to your Lightsail instance?
How to create a DNS zone and map it to your Lightsail instance?
Note: According to the most recent promotions of AWS, the Lightsail instances come with a 3 months free trial. However, it is recommended to check for pricing details before proceeding with the tutorial.
Step 01 — How to launch an AWS Lightsail instance with WordPress blueprint?
I. Sign into AWS Console
II. Search for ‘AWS Lightsail’ on services search bar. Click on the service to sign into Lightsail console.

III. Click on Create Instance button to launch an instance

IV. Set the following parameters to configure the instance
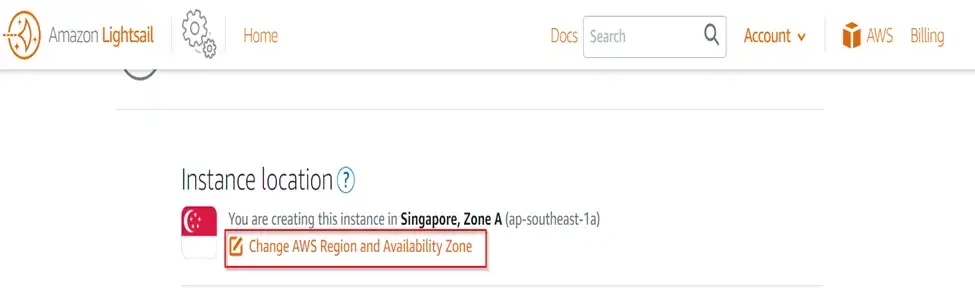
V. Choose the region/availability zone by clicking on ‘Change AWS Region and Availability Zone’.
VI. Chose the instance OS. (Note: Windows instances will cause an additional cost for the OS licenses)
VII. Chose the WordPress blueprint.

You are also allowed to enable automatic snapshots of your instance for recovery purposes. Also, a specific key pair can be defined on this screen for SSH logins, but both these settings will be left in default in this tutorial.
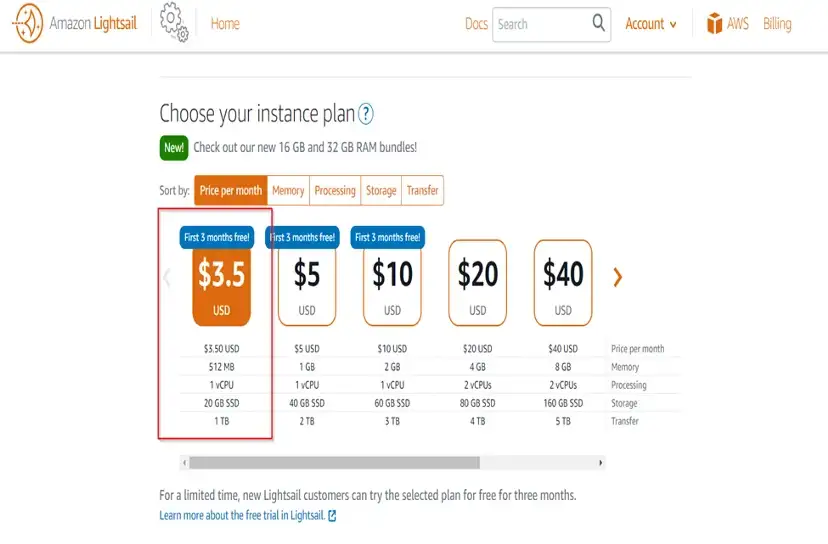
VII. Chose the instance plan. Learn about related pricing.
IX. Enter a name for your instance. Note that the name should be unique within each AWS region in your Lightsail account.
It should contain 2 to 255 characters and must start and end with an alphanumeric character or number.
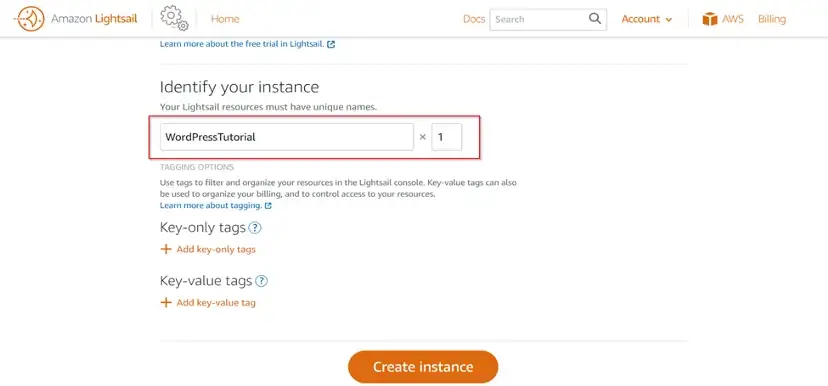
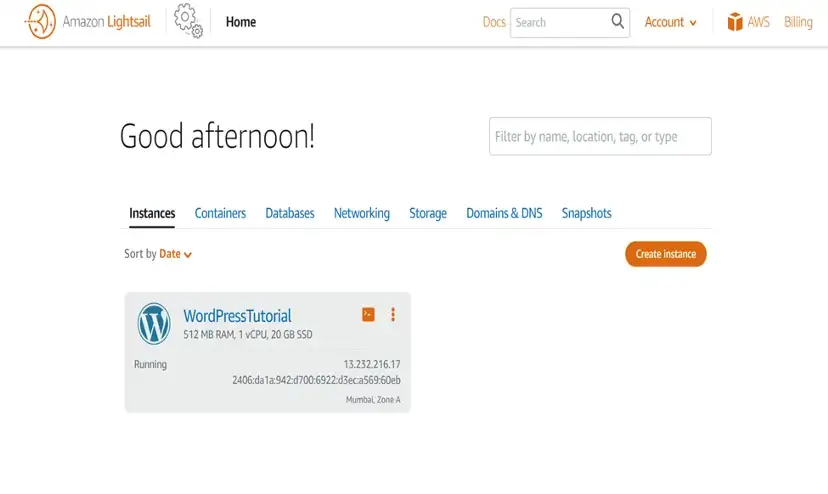
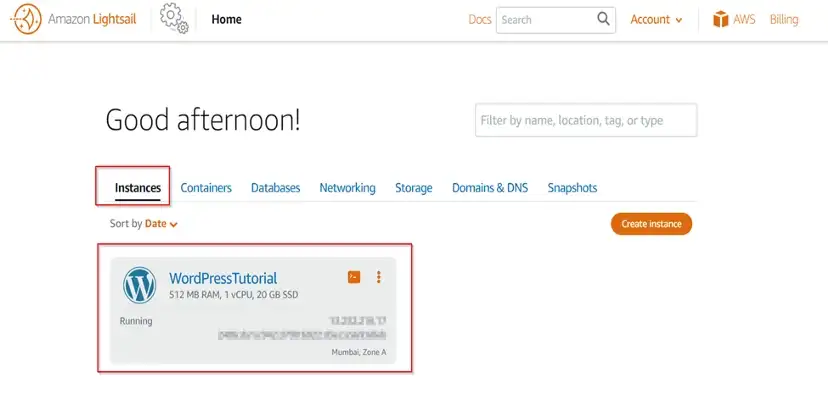
X. Click on Create Instance button which will launch the instance and you will be directed to the Lightsail console.
Step 02 — How to connect to your Lightsail instance using SSH?
SSH (Secure Shell) is a network protocol used to securely connect to a computer over a network. It is often used to remotely access a command line interface on a computer, such as a shell on a Unix-like operating system or a Command Prompt on Windows.
To use SSH, you need to use an SSH client on your local computer. When you connect to a remote computer using SSH, you can run commands, transfer files, and even manage the remote computer as if you were sitting in front of it. SSH uses encryption to secure the connection between the client and the server, making it a secure and convenient way to remotely access a computer over the internet.
But in this case, Lightsail console provides an easier option to log into your instance via SSH. It is important to note that the password to log into the WordPress administration dashboard is stored in the instance.
I. On the Lightsail home page, click on the created instance ‘WordPressTutorial’.
II. Click on ‘Connect Using SSH’ button on the instance home page.
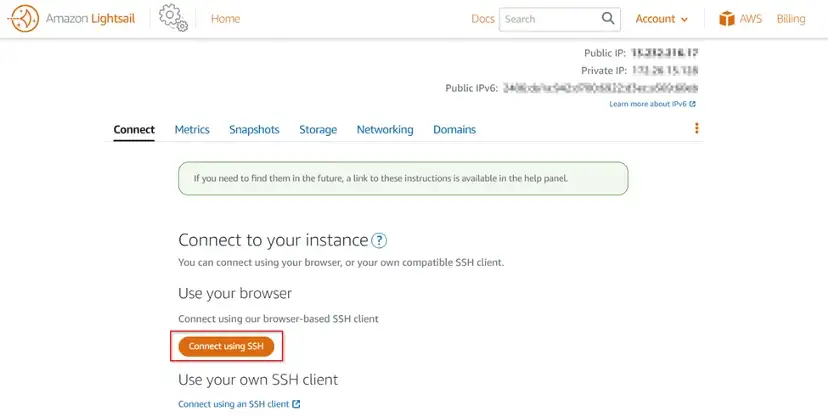
Above will open up a browser based SSH client and use the following command to retrieve the default WordPress Administrator login password.
cat $HOME/bitnami_application_password

Keep the password noted down in a secured location which will be used to log into the WordPress backend.
Step 03 — How to sign into your newly installed WordPress instance?
WordPress is a content management system (CMS) based on PHP and MySQL. It is an open-source platform that is widely used for building websites and blogs. WordPress was originally created as a blogging platform, but it has evolved over the years to become a powerful and flexible CMS that can be used to build any type of website.
One of the key features of WordPress is its user-friendly content management system, which makes it easy for non-technical users to create and manage content on their websites. WordPress also has a large ecosystem of plugins and themes that can be used to extend its functionality and change the appearance of a website.
WordPress is used by millions of websites around the world, including many small businesses, bloggers, and large organizations. It is known for being easy to use, customizable, and scalable, which makes it a popular choice for building websites of all sizes. The management of WordPress can be done by logging into its back end.
Open up a browser and enter the following URL.
The public IP address for your Lightsail instance can be found on the instance homepage.

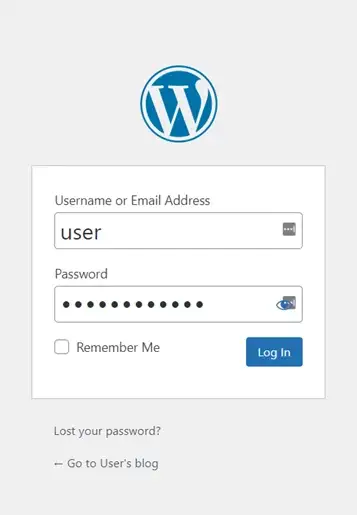
Above will take you to the WordPress administrator login page. Enter the following credentials as shown in the screenshot.
Username: user
Password: <the password extracted in step 02.
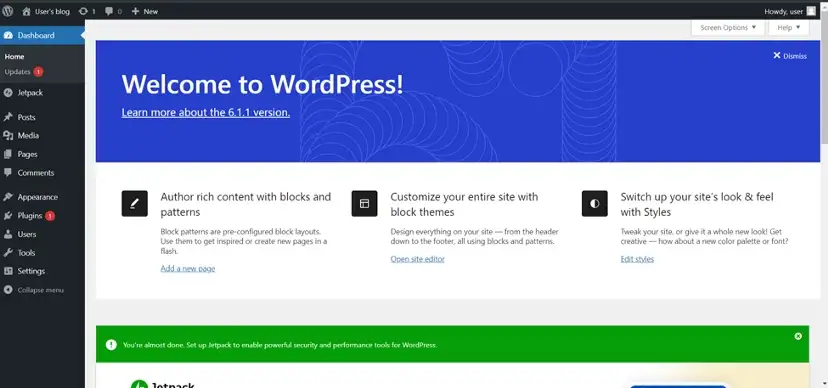
Above will take you to the administrator dashboard of WordPress through which you can perform necessary actions.
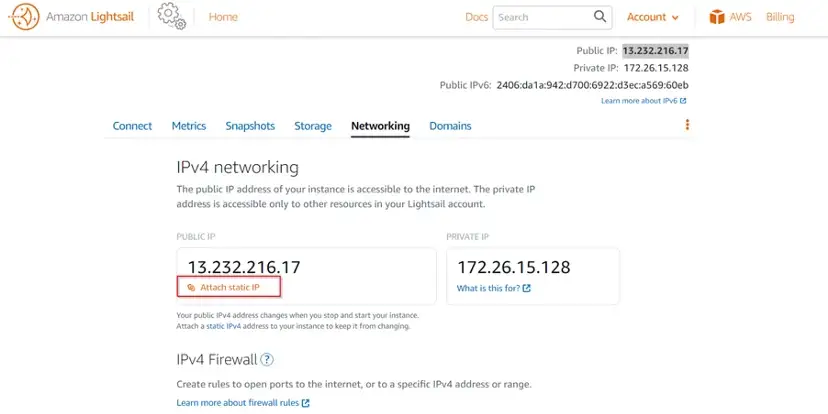
Step 04 — How to attach a static IP to your Lightsail instance?
The default public IP address changes whenever you restart your Lightsail instance which makes it not ideal for a website. Therefore it is important to create and attach a static IP address for this instance.
A static IP address is a permanent, fixed IP address assigned to a device or computer. It is in contrast to a dynamic IP address, which is a temporary address that is assigned to a device or computer when it connects to the internet and is released when the device disconnects.
Static IP addresses are useful because they allow devices to be easily located on the internet. For example, if you host a website on a server with a static IP address, users can easily access the website by typing the IP address into their web browser. Similarly, if you have a device with a static IP address, you can use it to connect to the device remotely over the internet.
The entire process of creating and attaching a static IP address can be done through the AWS Lightsail console as follows;.
Go to your instance home page and click on the ‘Networking’ tab. That will show a static public IP available which can be attached to the instance by clicking on ‘Attach Static IP’ option.
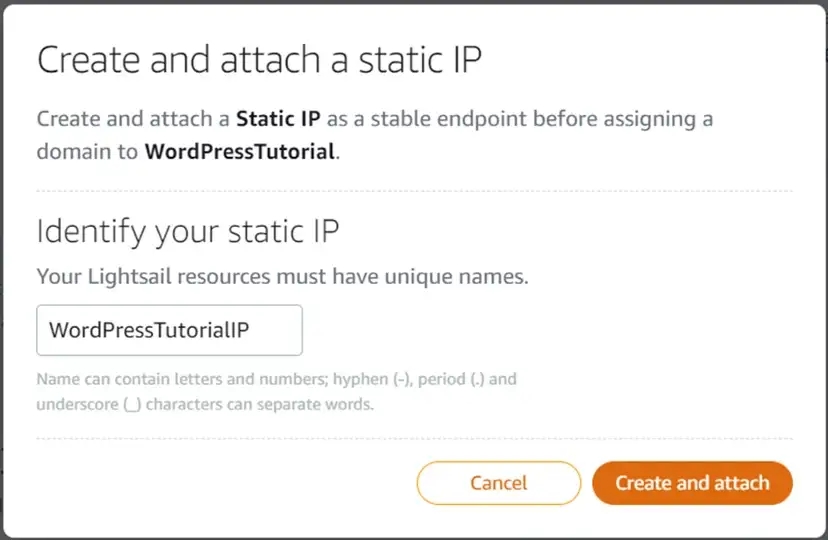
Provide a name to recognize this instance and click on “Create and attach IP” option.
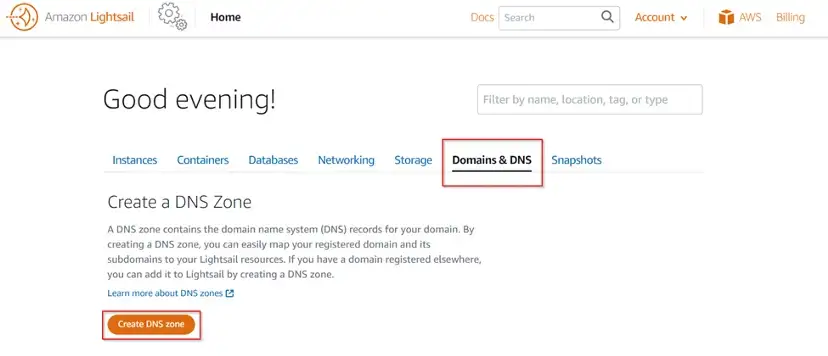
Step 05 — How to create a DNS zone and map it to your Lightsail instance?
A website can be accessed easily when there is a domain name. You should have a domain name but it will be easy to map that domain to your WorPress instance if you transfer the managemenge of your domain’s DNS records to Lightsail.
Complete the following steps to create a Lightsail DNS zone and map a domain to your WordPress instance.
In the Lightsail home page, click on ‘Domains & DNS’ option. And click on ‘Create DNS Zone’.
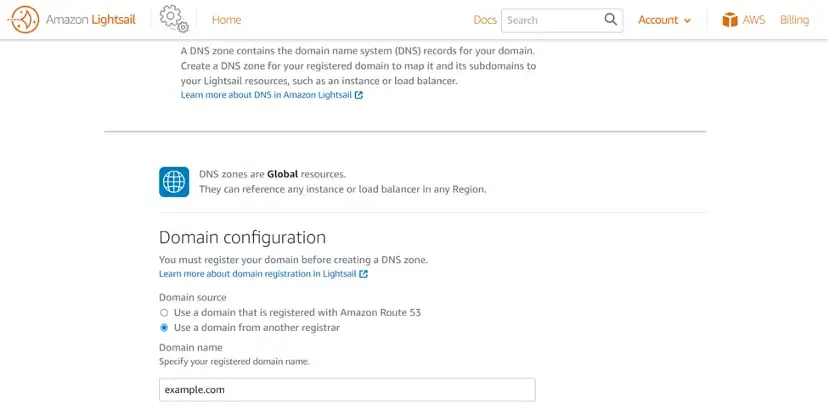
Make sure you have selected the ‘Use a domain from another registrar’. This will be applied for scenarioes where you already have a domain name registered with a different domain registrar. You can use the ‘Use a domain that is registered with Amazon Route 53’ if you are using AWS Route 53 service.
Enter your domain name in the provided space and click on Create DNS Zone option.
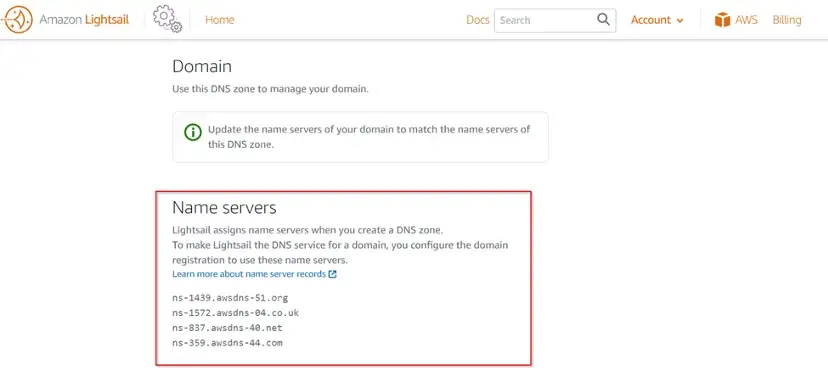
Note down the name server details which should be added through your current registrar’s portal.
Once the management of the domain is transferred, it is required to add an A record under your domain to point it to the WordPress instance. That can be done as follows.
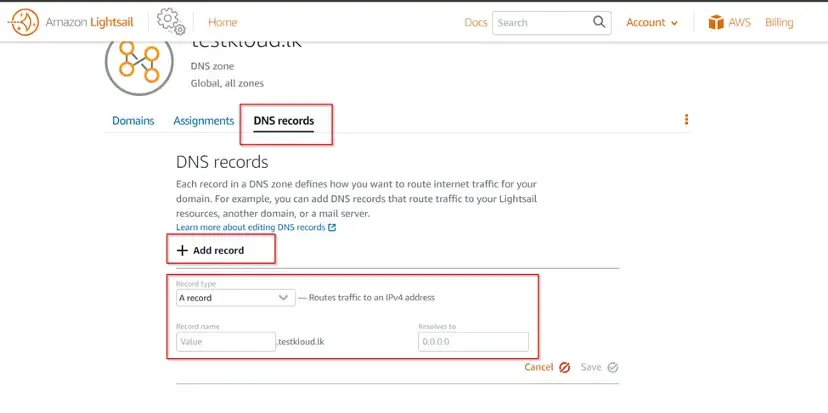
Click on ‘DNS Records’ section on the domain name page.
- Select the record type as A record
- Subdomain — @
- Resolves to : The static IP address of your instance.
Click on Save.
The above will enable the provided domain to bring your own WordPress website up with AWS Lightsail service. Amazon Lightsail is a great choice to develop, build, and deploy a variety of applications like WordPress, websites, and blog platforms.
Note: If you are using this as a lab, remember to clean up the creation by deleting the created instance.