


Photo by Anete Lūsiņa on Unsplash
Permission denied (publickey,gssapi-keyex,gssapi-with-mic). — AWS EC2 SSH User Creation Error


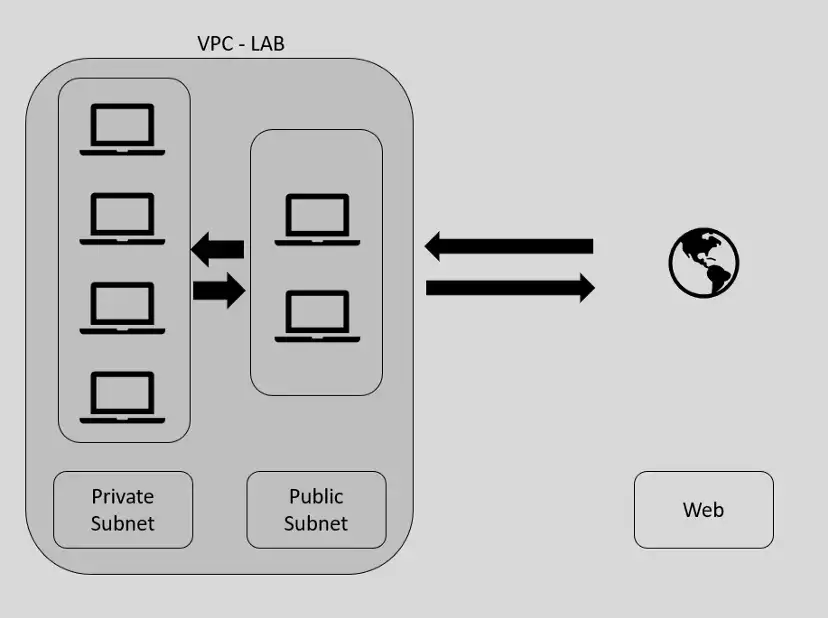
I have a simple lab environment hosted in AWS, as depicted in the following image. As it can be seen, there is one VPC (VPA-LAB) in which there are two subnets. One subnet is public facing and has been configured in a way so outsiders can SSH into those machines. And behind this, there is a private subnet in which four (04) machines are hosted.
This post will cover creating SSH user access to both public, and private domains, focusing on a few important steps that need to be followed to prevent the subjected error ‘Permission denied (publickey,gssapi-keyex,gssapi-with-mic).’.
The Concept of SSH User Access Creation
SSH is one of the most common methods used to provide user access to Linux-based machines. The concept of providing access to an EC2 instance through the SSH key boils down to the following concepts.
Key Pair
You should have a key pair generated for the new user. In AWS that can be done in the EC2 section. Assume that Sam is a new user who joined your organization last week. If you wish to grant him access to your corporate cloud infrastructure, make sure you log into your AWS console and create a key pair for Sam which then should be shared with him.
Home Directory
The new user should have a home to live in your EC2 instance. In the Linux world, this is his home directory. By going into /home directory, you will find a bunch of sub-directories that correspond to all the users who have access to this machine. In our case we should create a home directory for Sam within the /home directory of the machine. To do this you should access the machine using an user account which already has access to this machine with admin privilege. Once done, the following commands should be executed in order to create a home directory for Sam.
sudo adduser sam

Once the home directory is created, you can verify that by issuing the following command, which will list down the available home directories. The provided screenshot displays three user accounts: arosh-us, ec2-user, and sam.
Impersonating the New User
Once the user is created, the next list of commands should be executed by impersonating that user. In our example case, the admin should then switch into Sam’s profile before he issue the following commands. Impersonation of Sam’s profile can be done by issuing the following command. The given screenshot proves that the admin is now recognized as Sam.
Creating .ssh Sub Directory
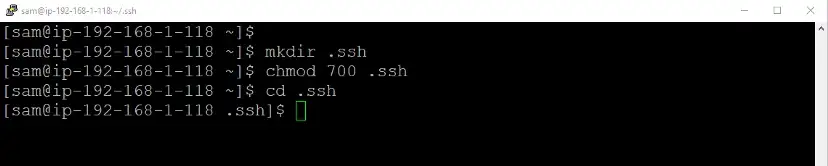
Upon becoming Sam now, you should create a sub directory within Sam’s home directory by the name .ssh. This will be the subfolder where you will store Sam’s public key. When Sam attempts to log into this machine using his private key, this public key will be matched against that and access will be granted.
mkdir .ssh //this command will create the .ssh folder
chmod 700 .ssh //this command will set relevant permission levels so only Sam can view, edit that folder.
cd .ssh //this command will take you inside the .ssh folder
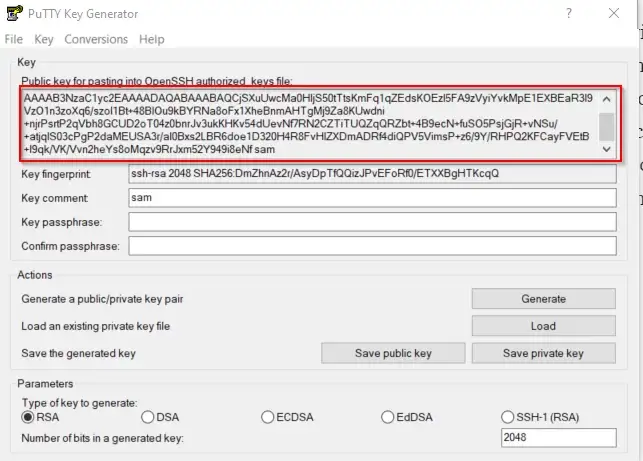
The public key can be extracted by loading the created key pair to a tool like putty keygen. The following screenshot displays a sample public key which was solely created for demonstration purposes.
Authorized Key File
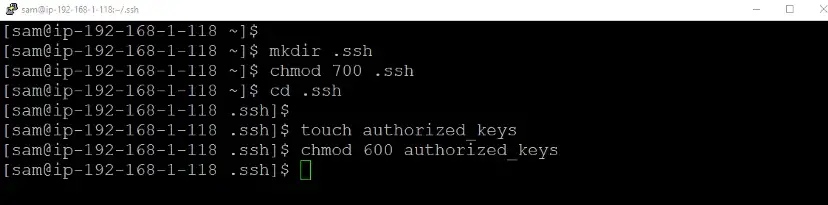
An authorized key file created by the name ‘authorized_keys’ is a file that will hold the public key of Sam. For this, you should create the key file, copy the public key from Putty Keygen Tool, open the created authorized_keys file and then paste the copied key into it. The following commands and screenshots depict the said procedure.
touch authorized_keys //this command creates the authorized_keys file
chmod 600 authorized_keys //this command set the permission of the file so only the user can view/edit it
Once the file is created you can copy the public key from the Putty Keygen tool (as depicted in one of the previous screenshots).
nano authorized_keys //this command will open the authorized_keys file. If you are using an Ubuntu machine, the following command will do the same using a different editor.
vi authorized_keys
Once done, the public key should be pasted, and the file should be saved.

Accessing the New User Account
Once the above procedure is done, Sam should be able to log into this machine using his private key. In this case, he can use a tool like Putty and the following procedure can be used for the purpose.
Load the Private Key to Putty

Provide the username and the public IP address of the machine
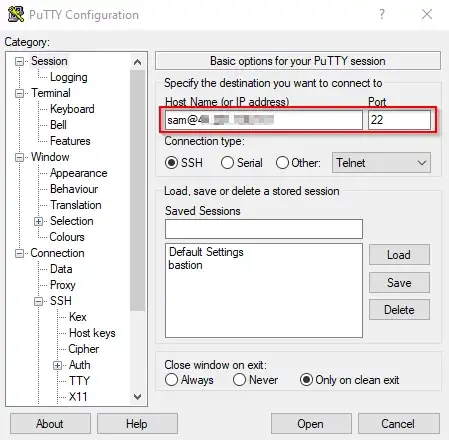
Keep in mind that the username you provide here and the home directory you created should have the same name.
If all above is done properly, that should provide access to Sam.
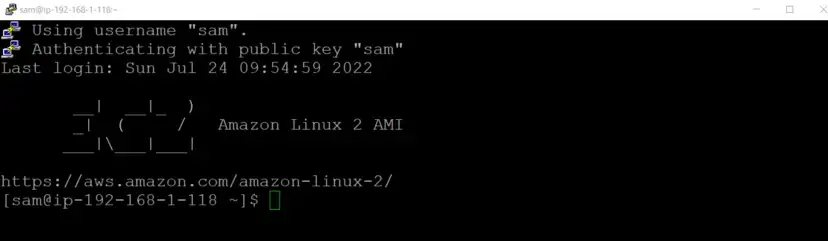
Permission denied (publickey,gssapi-keyex,gssapi-with-mic).
A very common error many new users experience is ‘Permission denied (publickey,gssapi-keyex,gssapi-with-mic).’. If you follow the above procedure, you should not experience this error. But in case if you are experiencing it please ensure to check the following key points as a troubleshooting procedure.
Username
Double check and confirm that you are using the correct username. The name of the home directory you created for the new user should be equal as the username he uses when login in.
Permission Creation
.ssh folder and the authorized_keys files should be edited for proper permissions. Make sure to issue the proper chmod command at both folder and file levels to set correct permission levels.
Copy the Public Key Properly
A common situation that could cause this error is a public key mismatch. When copying the public key, always copy it from the window shown in Figure 6.
Format of Public Key
AWS requires the public key to be in a single line. Ensure you do not create line breaks by pasting the key into a word editor and copying it.
Also, when you are using the VI editor, it tends to remove the first character ‘s’ when you are pasting the key into the authorized_keys file. Always double-check to ensure you pasted the full key.
Conclusion
SSH user creation for Linux-based AWS instances is a common requirement for many system administrators. However, it can be a little tricky, and troubleshooting can be painful if you do not understand the basic concepts of how it works. This article is all about creating a user properly and troubleshooting certain common errors.